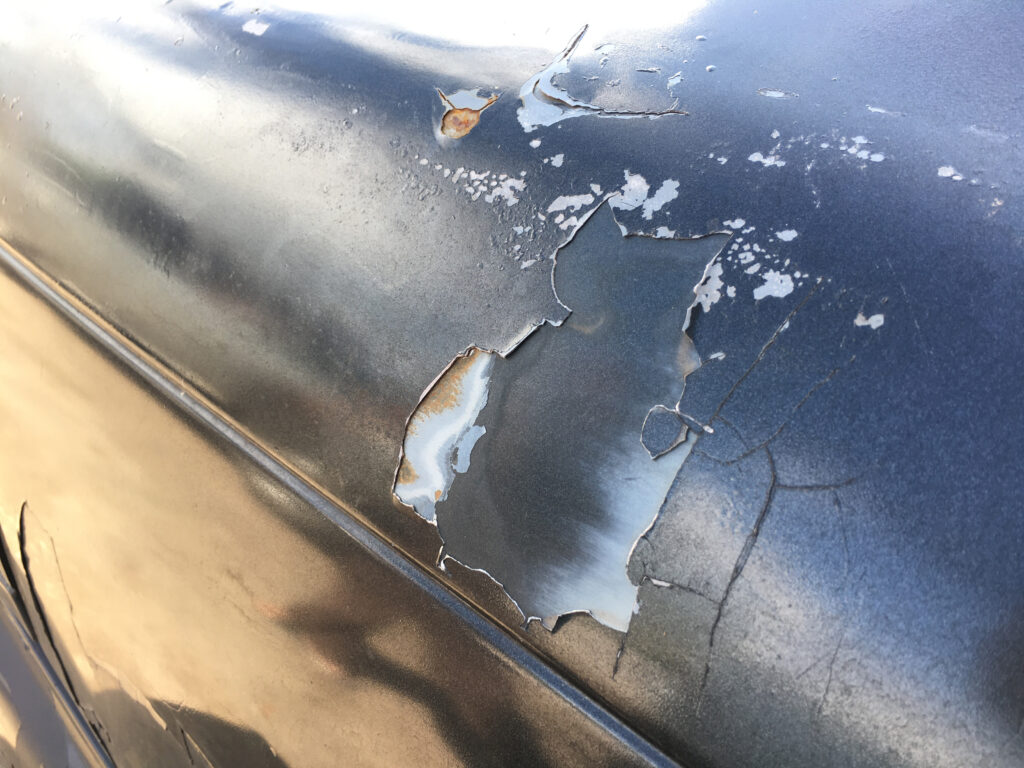
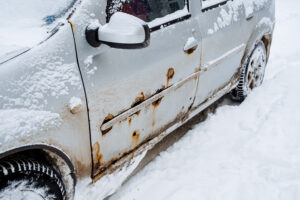
Paint blisters, also known as bubbles, can be a common issue for vehicle owners. These unsightly spots occur when paint loses its adhesion to the surface, causing a bubble-like appearance. While they might seem like a minor aesthetic problem, they can eventually lead to more severe issues such as rust or paint peeling. Fortunately, there are effective ways to deal with this problem.
In this guide, we’ll take a detailed look at how to fix paint blisters on a car and integrate these steps into your overall car maintenance routine. Whether you’re into auto fixing or simply want to keep your vehicle looking pristine, this guide will help you address this issue effectively.
Understanding What Causes Paint Blisters on a Car
Before discussing how to fix paint blisters on a car, it’s essential to understand what causes these issues in the first place. Paint blisters typically occur due to:
- Moisture: When water or moisture gets trapped beneath the paint surface, it can expand and form blisters, especially in hot temperatures.
- Contaminants: Dust, dirt, grease, or oils on the car’s surface can prevent the paint from properly adhering, leading to blister formation.
- Extreme Heat: Excessive heat can cause the paint to expand and separate from the car’s surface, leading to bubbles or blisters.
- Poor Preparation: Inadequate cleaning or priming before painting can result in a subpar finish, making the surface prone to paint blisters.
Now that you know the causes, let’s dive into how to fix paint blisters on a car.
1. How to Fix Paint Blisters on a Car: Preparing the Surface
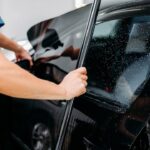
The first step in fixing paint blisters is preparing the surface for the repair process. Proper preparation is key in auto fixing, especially when dealing with paint issues. Start by cleaning the affected area to remove any dirt, dust, or grease that might have contributed to the blisters.
- Clean the Area: Use a mild soap and water solution to thoroughly clean the blistered area. Afterward, dry the surface completely to prevent any moisture from getting trapped during the repair.
- Remove Blisters: Using a sharp razor or sandpaper, gently sand down the blistered areas. This process will remove the damaged paint and smooth out the surface in preparation for the new paint application. Make sure you sand beyond the blistered spots to ensure a seamless finish.
Proper surface preparation is an essential part of car maintenance, and doing it right will lead to a more durable paint job.
2. Sanding and Smoothing the Affected Area
Once you’ve removed the blisters, the next step in how to fix paint blisters on a car is sanding. The goal is to create a smooth, even surface for the new paint. This step is crucial in vehicle fixing, as any rough or uneven spots could lead to an imperfect finish.
- Use Fine-Grit Sandpaper: Start with a coarser grit (around 220-grit) to remove any remaining paint imperfections. Then, switch to a finer grit (around 400-grit) to smooth the surface. Be careful not to sand too deeply, as you don’t want to expose the bare metal underneath the primer.
- Wipe Away Dust: After sanding, wipe away all dust particles with a clean, dry cloth. Any remaining debris can affect the paint adhesion during the next steps of car fixing.
Sanding the affected area is a vital part of auto fixing, as it ensures that the new paint will adhere properly and create a flawless finish.
3. Applying Primer: The Foundation of Paint Repair
The next critical step in how to fix paint blisters on a car is applying a high-quality primer. Primer serves as a bonding agent between the bare surface and the paint. It is especially important in vehicle fixing because it helps to prevent further blistering or peeling.
- Choose the Right Primer: Use a primer designed specifically for automotive surfaces. It’s best to select a product that matches your car’s original paint type (e.g., acrylic or enamel).
- Apply Evenly: Apply the primer in thin, even coats. Make sure to cover the sanded area completely. Allow each coat to dry according to the manufacturer’s instructions before applying the next layer.
- Sanding Between Coats: For a smooth finish, sand the primed area lightly with fine-grit sandpaper between coats. This will ensure that your paint job looks professional and blends in with the surrounding paint.
Primer application is an essential part of car maintenance because it ensures a durable, long-lasting repair.

4. Repainting the Surface: How to Achieve a Flawless Finish
After applying the primer, it’s time to repaint the area to match your car’s existing color. This step is critical when learning how to fix paint blisters on a car, as it involves the final layer that will protect the surface and give the car a fresh look.
- Match the Paint Color: It’s important to get an exact match for your car’s paint color. You can usually find the color code on your vehicle identification plate, or by consulting your car’s manufacturer. Alternatively, you can have a professional match the color.
- Apply Thin Coats: Apply the paint in several thin layers to prevent unevenness and streaks. Hold the spray can or paint gun at a distance of 6-10 inches from the surface and use steady, sweeping motions.
- Allow Drying Time: Make sure to let each coat dry completely before applying the next. This prevents the paint from running or dripping, resulting in a cleaner finish. Patience is key in vehicle fixing, especially when it comes to achieving a professional-looking paint job.
5. Finishing Touches: Sealing and Polishing
Once the paint has dried, you need to apply a clear coat to seal and protect the new paint job. This step is essential in car maintenance, as it shields the paint from external elements like moisture, sunlight, and road debris, helping to prevent future blisters.
- Apply Clear Coat: Use a clear coat designed for automotive finishes. Like the paint, apply it in thin, even coats and allow each layer to dry before applying the next.
- Polish and Buff: After the clear coat has dried, you can further enhance the finish by polishing and buffing the area. This will give your car a glossy, professional look, blending the new paint seamlessly with the existing surface.
Polishing not only enhances the appearance but also helps in car fixing by smoothing out any minor imperfections that may have occurred during the painting process.
6. Regular Car Maintenance to Prevent Future Paint Blisters
Now that you know how to fix paint blisters on a car, it’s important to implement preventive measures in your car maintenance routine to avoid them in the future. Here are a few tips to keep your car paint in pristine condition:
- Keep Your Car Clean: Regularly washing your car helps remove dirt, dust, and contaminants that can cause paint to bubble or blister. Clean car paint is less likely to develop blisters, as the surface is free of debris.
- Protect Your Car from Extreme Conditions: Avoid exposing your car to excessive heat, humidity, or salty conditions without proper protection. If you live in a coastal area or drive in winter, it’s crucial to wash your car more frequently to remove salt and moisture that can lead to corrosion and paint issues.
- Apply Protective Wax: Applying wax or sealant to your car’s paint provides an extra layer of protection against environmental damage, such as UV rays and moisture, which can cause blisters to form.
By integrating these tips into your vehicle fixing routine, you can prevent future paint blisters and maintain the integrity of your car’s exterior.
A Long-Term Solution for Car Paint Issues
Learning how to fix paint blisters on a car is a valuable skill for any car owner, whether you’re passionate about auto fixing or just want to keep your vehicle in top condition. By properly preparing the surface, using high-quality materials, and following the right steps in applying primer and paint, you can achieve a flawless finish.
Additionally, incorporating preventive measures into your car maintenance routine can help you avoid future issues and keep your clean car paint looking its best for years to come.
Whether you’re fixing a car for the first time or are an experienced DIY enthusiast, addressing paint blisters quickly and effectively will ensure your vehicle remains in great shape, both in terms of appearance and value.